
In this guide
A guy stopped me at Deckers last fall, pointed at the little orange thing on my leader, and asked what it was for. Fair question. He’d been fishing two weeks. I told him it does two jobs at once — it holds my flies at the right depth and it tells me when a fish eats — and that getting both of those right is most of nymphing. He nodded, looked at his own rig, and said his bobber was set about a foot off the water. That was the problem, not the bobber.
So let’s talk about strike indicators. Not which brand is hippest — which type does what, where each one falls down, and how to set the thing so it actually catches fish. A good half of my season is spent tight-line euro nymphing with no indicator at all, so I’ll get to when you should ditch it entirely. The other half, near enough, has an indicator on the leader — it’s a genuine even split for me, not a technique I’ve grown out of — and for years I fished mine badly and blamed the flies for it. I bought a lot of nymphs to solve a problem that was three feet of leader long.
What a strike indicator actually does
Two jobs. First, it suspends your rig — it’s a floating reference point that hangs your nymphs at a set distance below the surface. Move it up the leader, your flies ride deeper. Move it down, they ride shallower. That’s your depth control. Second, it telegraphs the take. A trout inhales a nymph and rejects it in well under a second; you will never see or feel most of those eats directly. The indicator is your eyes underwater. When it stalls, dips, twitches, or skates sideways against the current, you set. That’s it. Everything else is just trade-offs between how well a given indicator does those two jobs — and every indicator on the shelf is a compromise between them, sold to you as a breakthrough.
Worth saying plainly: a “strike indicator” is a bobber. Fly anglers got precious about the word a long time ago, but it floats and it signals a bite. Don’t let anybody make you feel like there’s a moral hierarchy here.
If you want the full rig — leader formula, split-shot placement, fly spacing — I broke that down in the South Platte nymph rigging guide. This piece is just the indicator.
The types, honestly
Yarn
Yarn indicators are tufts of synthetic or wool yarn treated with floatant. They’re the most sensitive thing you can fish short of no indicator at all. Because they sit in the surface film instead of bobbing on top of it, they register the lightest, most tentative takes — the kind a Thingamabobber sleeps right through. They also land softly, which matters in skinny, pressured water like Cheesman Canyon where a hard splash sends fish to the next county.
The cons are real, though. Yarn is hard to see at distance and in glare or chop — exactly the conditions where you most need to see it. It waterlogs as the day goes on and needs re-dressing with floatant, which I always remember to do about three drifts after it has already sunk. And it casts like a wet sock once it soaks up water, especially with any wind. Yarn is a low-water, technical-day, short-line tool. It is not the thing you reach for when you’re chucking a heavy double-nymph rig across a deep run.
Thingamabobber and round bubbles
The hard plastic round bubble — Thingamabobber being the one everybody names — is the workhorse of American nymphing for a reason. It floats forever, you can see it from across the river, and it’ll hold up a genuinely heavy rig with split shot and a tungsten point fly without drowning. For deep, fast water it’s hard to beat. If I’m fishing a big push at Deckers in higher flows, a round bubble is often what’s on the leader.
The downsides: it lands with a splash, which spooks fish in calm or shallow water. It’s less sensitive than yarn — a soft take can pull the flies without moving that buoyant ball enough to read. And the classic attachment method, where you loop the leader through and peg it, kinks your leader at the attachment point. Over a day of moving it up and down, you can put a permanent curl in your tippet right where you don’t want one. I’ve retied a leader streamside more than once because the pigtail above my flies looked like a phone cord. Newer versions and aftermarket fixes help, but the kink is the round bubble’s original sin.
Foam and “football” — New Zealand style
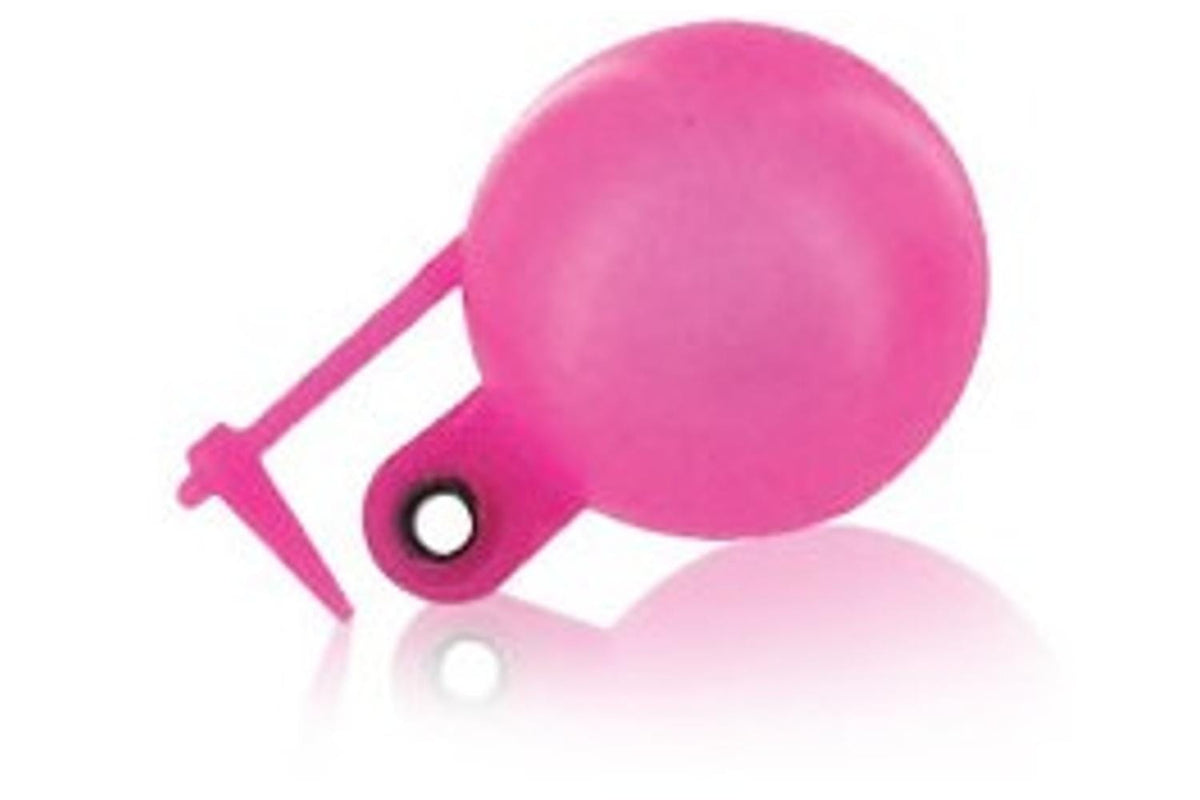
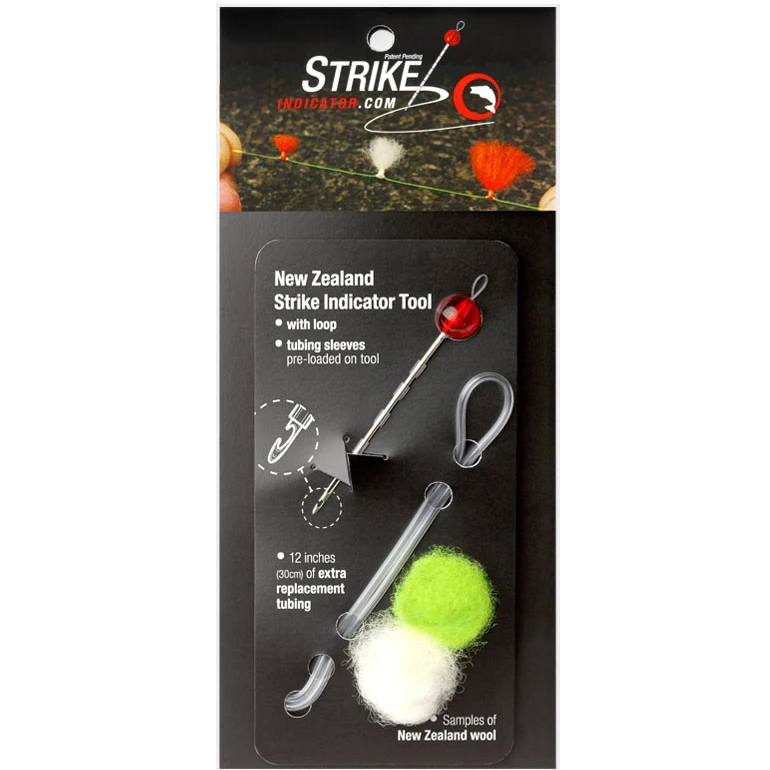
Foam indicators cover a lot of ground: pinch-on adhesive foam, slip-on foam stoppers, and the tapered “football” or New Zealand-style strike indicators where you pull a loop of leader through a tube and lock it with a peg or a tuft of wool. The New Zealand system in particular is a favorite of a lot of technical anglers — it lands soft like yarn but is more visible, and you can size the wool to the water. It’s a genuinely good middle ground between yarn’s sensitivity and a bubble’s visibility.
The catch is fiddliness. The New Zealand tool-and-peg routine is more steps than clipping on a bubble, and changing depth on the water is slower. Cheap pinch-on foam tends to slip down the leader after a few drifts and leaves a gummy residue. Good foam systems are excellent; the bargain-bin stuff will frustrate you.
Screw-on indicators (the OROS, the one I reach for)
This is the category I’ve landed on for most of my indicator fishing, and the specific one I fish is the OROS screw-on. It’s a foam ball in two halves with the company’s Soft-Lock hardware inside — you unscrew the top, lay your leader in the slot, and screw it back down until it stops. No threading the leader through a hole, no peg, no tool, no toothpick. The thing I care about most: it doesn’t kink the leader. The line sits in a channel and gets pinched gently, so when I pull the indicator off there’s no permanent curl left behind. That alone fixed my biggest gripe with round bubbles.
The other thing I like is on-the-water adjustment. Back the top half off a half-turn, slide the whole thing up or down the leader to change depth, snug it back down. I’m not unrigging, I’m not re-pegging, I’m just sliding and locking. When you’re dialing depth run-to-run — which, as you’ll see below, is most of the game — that speed matters. They’re reusable too; I’ve fished the same set across a lot of trips. OROS isn’t an affiliate partner of mine, so I’ve got no skin in pushing them — I just fish them and they solve the two problems (kink, slow adjustment) that bugged me about everything else. They float well, they’re plenty visible in the standard orange and the hi-vis chartreuse, and the black “anti-glare” option is genuinely useful over spooky fish on a flat.
If they have a weakness, it’s that a screw-on foam ball isn’t quite as sensitive as a bare yarn tuft on a dead-flat technical day. On those days I’ll still drop down to yarn. But for the large majority of my indicator water, the screw-on is the one.
Dry-dropper — when the dry IS the indicator
The cleanest indicator is a fly that also catches fish. In a dry-dropper rig you tie a nymph off the bend of a buoyant dry — a Chubby Chernobyl is my go-to platform because it floats like a cork and holds up a decent dropper — and the dry does double duty. Fish eats the nymph, the dry goes under, you set. Fish eats the dry, you set anyway. You’re covering two columns with one rig and you’ve got nothing on the leader that isn’t a fly.
I love it in pocket water and on summer afternoons when fish are looking up. The limits are depth and weight: a dry can only suspend so much, so once I need to get nymphs down past three or four feet in current, the dry won’t hold the rig and it’s back to a real indicator. Full breakdown in the dry-dropper guide.
Setting depth — the part I got wrong the longest
Here’s the rule that fixed more of my nymphing than any fly change: set your indicator at roughly one and a half to two times the water depth, measured from indicator to bottom fly. Two feet of water, you want the indicator about three to four feet up the leader. Sounds like too much. It isn’t.
Why so much? Because your flies don’t hang straight down. Current pushes them downstream and back up toward the surface in a long diagonal, and your split shot needs slack to actually reach the bottom of that arc. If you set the indicator at exactly the water depth, your nymphs ride a foot or two off the bottom the entire drift and the fish never see them. Trout feeding on nymphs sit low — they’re inches off the cobble, not midwater. Your stuff has to get down there.
My own version of the Deckers guy’s mistake lasted about two seasons: I was scared of hanging up, so I set short, drifted clean all day, and went home with a full fly box and nothing else. You should be ticking bottom occasionally. If you never snag, never tick, never lose a fly to the rocks, you are fishing too shallow. Bumping bottom now and then is the cost of being in the zone. I leave flies on the cobble at Deckers on a regular basis, and I’ve made my peace with the fly budget — a couple of donated nymphs a trip means I was actually down where the fish live. A clean fly box at the end of the day is not a receipt for skill; it’s a receipt for fishing over their heads. Set deep enough that you tick every handful of drifts, then back off a hair.
And adjust per run. Every seam, every bucket, every tailout is a different depth. The reason I value a screw-on I can slide in two seconds is that I’m changing it constantly — deeper through the slow deep bucket, shallower over the shelf, deeper again in the next pool. For years I set mine once in the parking lot and then fished four different depths of water with one setting, which is roughly like picking a gear at the trailhead and refusing to shift.
My take
If I could give one tip to anyone fishing an indicator on the Platte, it wouldn’t be about which indicator to buy. It’d be this: set it deeper than feels right, and move it every single run. Depth control beats gear, every time, and it isn’t close — the best indicator in the box, set eight inches too shallow, is a very expensive way to fish over trout. Buying a new indicator feels like progress. Sliding the one already on your leader actually is progress. I learned those two in the wrong order, and the fly shop did fine out of it.
Sensitivity versus visibility — pick your poison
Every indicator decision is a slider between two things you both want and can’t fully have. Sensitivity is how faithfully the indicator reports a take. Visibility is whether you can actually see it to read that take. They pull against each other. Yarn is the most sensitive and the hardest to see. A big round bubble is the easiest to see and the least sensitive. Everything else lives somewhere on that line.
| Type | Sensitivity | Visibility | Flotation | Best water |
|---|---|---|---|---|
| Yarn | Highest | Low | Low (needs re-dressing) | Flat, clear, technical; short line |
| New Zealand / good foam | High | Medium | Medium | Spooky water where you still need to see it |
| Screw-on foam ball | Medium-high | High | High | Most everyday indicator water |
| Round bubble | Lowest | Highest | Highest | Deep, fast, glary; heavy rigs and shot |
| Dry-dropper | High | Medium | Low (depth-limited) | Pocket water, summer, shallow droppers |
Match the slider to the day. Flat, clear, pressured water with sipping fish — slide toward sensitivity (yarn, small foam, small screw-on). Big, broken, fast, glary water with a heavy rig — slide toward visibility and flotation (round bubble, larger screw-on). What I did for years was own exactly one indicator and ask it to do every job on the river, which is how you end up with a tool that’s mediocre everywhere and blame the trout for noticing. Carry two or three sizes and a couple of styles. They’re cheap. The Fly Fishing Place stocks indicators and tippet if you’re restocking the box — code RDC works there.
How big should my strike indicator be?
Big enough to float the rig you’re actually fishing, and not one size bigger. The test is simple: rig up, drop the flies into slow water at your feet, and watch. If the indicator sits low and drowns every time the point fly ticks a rock, it’s undersized, and you’ll spend the day setting on nothing. If it rides high and proud like a mooring buoy, it’s oversized — an over-buoyant indicator has to be pulled to move, so it sleeps through soft takes and it lands harder than it needs to.
Most of my Platte indicator work is a small or extra-small ball carrying a single tungsten point fly and no shot. I size up to a medium only when I’ve added split shot or gone to a heavy anchor fly in high water, which on a bottom-release tailwater usually means late spring. Two sizes covers nearly everything I fish, and the smaller one lives on the leader far more than I expected when I bought the pack — a running theme with me and tackle. Size is also the cheapest sensitivity upgrade there is: dropping one size does more for your take detection than switching brands ever will.
When to ditch the indicator entirely
For a good share of my fishing, the best indicator is no indicator. Tight-line euro nymphing removes the bobber completely: you fish a long leader with a sighter — a section of bright bi-color mono — and stay in direct contact with your flies. You read takes through the sighter and through your hand. No splash, no kink, no surface drag pulling your drift around, and depth control that’s instant because you’re managing it with rod position instead of a fixed stopper on the leader. That’s why the euro rod earns roughly half my days on the South Platte — and why the indicator rod keeps the other half instead of gathering dust in the garage.
It’s not a free lunch. Euro is a short-to-medium-range game — you’re fishing water within a rod-and-leader length, not bombing across a wide river. For reaching a far seam, a long mended drift down a current line, or suspending flies at a precise depth through a long deep run, an indicator still does things tight-lining can’t. I fish both, and I switch based on the water in front of me. I dug into that whole decision in euro rod versus indicator rod and the euro nymphing guide if you want the deeper version.
One more honest note: the indicator-versus-euro thing gets treated like a religious war online. It isn’t. They’re different tools for different water, and the angler who can do both — and knows when to switch — catches more than the purist on either side. My favorite Platte point fly, the Blowtorch nymph, catches fish under an indicator and on a tight line equally well. The fly doesn’t care how you got it in front of the trout.
Frequently asked questions
How far should my strike indicator be from my flies? Set it at about 1.5 to 2 times the water depth, measured from the indicator down to your bottom fly. In two feet of water that’s roughly three to four feet of leader below the indicator. Current pushes your nymphs downstream and up, so you need that extra length for the flies to actually reach the bottom where trout feed. If you never tick the bottom, you’re set too shallow.
Do strike indicators spook fish? They can. A hard plastic round bubble landing on flat, clear, pressured water like Cheesman will move fish. That’s why soft-landing options — yarn, foam, or a black “anti-glare” indicator — earn their keep over spooky trout. In broken or faster water the splash matters far less, and visibility and flotation become the priority instead.
What’s the difference between a screw-on indicator and a Thingamabobber? A round bubble like a Thingamabobber attaches by looping the leader through and pegging it, which can kink your tippet, and it lands with a splash. A screw-on like the OROS clamps the leader in a channel between two foam halves with no peg and no kink, and you can slide it to a new depth in seconds without unrigging. The bubble floats and shows up better in big water; the screw-on is cleaner on the leader and faster to adjust.
When should I stop using an indicator and fish tight-line euro instead? Drop the indicator when you’re fishing close water — within a rod-and-leader length — and want maximum contact and instant depth control with no surface drag. Keep the indicator when you need to reach a far seam, run a long mended drift, or suspend flies at a set depth through a long deep run. Most days I carry the option to do both and switch based on the water in front of me.
Bottom line
The indicator is the least glamorous thing in your vest and one of the most important. Get the depth right, match the type to the water, and don’t be afraid to take it off entirely when the river asks for it. If you only change one thing tomorrow, set it deeper than feels right and slide it every run — that single habit has fixed more of my fishing than every fly I’ve ever bought.
Once the indicator’s dialed, the next thing that moves the needle is the rig hanging under it. Here’s the South Platte nymph rigging guide — leader formula, split-shot placement, and fly spacing, all in one place.