
In this guide
The whip finish is the knot that ends every fly, and it’s the one piece of tying that beginners are most likely to fake. I know because I faked it for my first season — back when I was still figuring out which end of the bench to sit at. I’d wrap a bunch of half-hitches over the head, glob on enough head cement to drown a midge, and call it good. Then I’d catch three fish on a Pheasant Tail and watch the thread unspool off the hook like a party streamer. Lost more flies to bad heads that year than to trout.
A proper whip finish fixes that with five wraps of thread under tension. It locks the working thread under itself, against the hook shank, so the fly you spent four minutes on gets to have a career. There are two ways to do it — with a tool and with your hands — and below I’ll walk through both, when I reach for each, and the small mistakes that quietly ruin good flies.
The short version — five wraps and a drop of cement
A whip finish locks the working thread under five wraps of itself, cinched against the hook shank behind the eye — that’s what keeps a fly from unraveling, and a drop of head cement or UV resin is just insurance on top of it. Tie it two ways: with a rotating whip finisher (fastest, cleanest, what I reach for on almost every fly), or with the two-finger hand whip (for #22 midges and for the night you left the tool at home).
Five wraps, one drop of cement, a small clean head. That’s the whole job, and it’s the difference between a fly box and a graveyard.
At a glance
| Method | Speed | Cleanliness | Learning curve | When to use |
|---|---|---|---|---|
| Rotating tool | Fastest | Highest | ~10 minutes | Almost every fly I tie |
| Hand whip (two-finger) | Medium | High, once practiced | 1–2 hours | Tight spots, tiny flies, no tool around |
| Half-hitches (don’t) | Fast | Bulky, fails | None | Never. They are not a whip finish. |
What the whip finish actually does
The whip finish wraps the working thread under several turns of itself, cinched against the hook shank near the eye. The friction of those wraps trapping the tag is what keeps the fly from unraveling. That’s the whole mechanism — no glue required to hold it together. Five wraps is the standard (six if you want a touch more bite): fewer and it can creep loose, and past six you’re mostly building a bulbous head that no fish asked for.
Before the wraps, though, there’s a control almost nobody teaches beginners, and it does more for head size than wrap count ever will: which way your bobbin is spinning. Tying thread is multifilament, so it responds to twist. Spun clockwise as you look down at the hook eye, it tightens into a round cord — strong, bitey, what you want for flaring hair or cutting a rib. Spun counterclockwise it untwists and opens into a flat ribbon that wraps wide and stacks almost no bulk. Give the bobbin a few counterclockwise turns before you finish and the same five wraps lay down visibly slimmer. Keeping a head small is thread management before it’s anything else, and I tied for a couple of seasons without knowing the bobbin had an opinion at all.
One caveat that trips people up when they switch threads: gel-spun is slick. Nano Silk and the other GSPs will hold up a fly you could tow a car with, and then slide against themselves like they’ve never met. Give a gel-spun whip an extra turn or two rather than stopping dead at five. The wrap count isn’t a rule, it’s a response to how much friction your thread brings to the argument.
After the whip finish, a small drop of head cement or UV resin seals the wraps. Say that part back to yourself, because it’s the bit everyone gets backwards: the whip finish does the work, the cement is insurance. People who skip the whip and trust the glue are gluing a knot that isn’t there. One durability trick worth knowing on flies you fish hard: lay down two short whip finishes — lock one, then a second right on top — and it’ll outlast a single long one without adding any bulk.
A half-hitch — the thing most of us do before we learn better — is a single loop pulled tight. To get anywhere near the security of a whip finish you have to stack several of them, and every one you add is more bulk sitting behind the eye of a fly that still works loose as it gets fished. Half-hitches aren’t a shortcut to a whip finish. They’re a different, worse knot wearing a trench coat. Learn the whip.
Method 1: the rotating tool (what I reach for)
A Matarelli-style rotating whip finisher is a little hand tool with a fixed hook at the bottom and a rotating arm at the top. Handed one cold, most people would guess it’s for extracting something from a wine bottle. You catch the thread, position the tool over the hook eye, rotate while keeping tension — five turns later the thread is locked. Every tool in this class works the same way, which is why the technique below transfers to whichever one ends up on your mat.
Two of them live on mine, for a job that takes five seconds — which tells you everything about how I buy tools, and is the same instinct that put more rods in my closet than I have arms. There’s a Loon Ergo Whip Finisher in yellow — the one pictured up top. The fat handle doesn’t cramp my hand over two dozen flies, and the base is sharpened, so it finishes the fly and clips the thread without me putting anything down. The other is a Stonfo Elite, which turned up later the way the rest of my Stonfo tools did. I couldn’t give you a spec sheet defending it. I just keep picking it up, which is either a real preference or a story I tell myself, and after this many flies I’ve stopped needing to know which.
Step by step
- Hold the bobbin in your off hand, thread coming straight down from the hook.
- Pick up the whip finisher. The fixed hook (the small bend) sits up, the rotating arm (the longer piece) hangs down.
- Catch the thread. Pass the fixed hook under the thread and the rotating arm over it, so the thread crosses both and forms a small triangle.
- Rotate the tool’s body while keeping the arm in contact with the thread. You’ll see wraps building on the hook shank behind the eye. Make five full rotations.
- Slide the tool toward the eye as you finish the last rotation, transferring the wraps off the tool and onto the shank.
- Pop the thread off the rotating arm first. This is the step most write-ups skip, and skipping it is why finishes go wrong — cinch down with both ends still engaged and you’ve just tied a very secure knot around the tool you were using. I did this for a while and blamed the tool.
- Now pull the bobbin tight — the loop on the remaining fixed hook closes and cinches the wraps down against the shank.
- Slide the fixed hook free, trim the tag close, and add a drop of cement.
The first ten times, you will fumble it, drop the thread, and quietly question whether your hands are on the correct arms. The eleventh time it clicks, and from then on the motion lives in your fingers and not your brain. That’s the whole curve. Ten ugly reps and a beer’s worth of patience.
What to avoid: letting the bobbin go slack during the rotation. The instant the thread loses tension, the wraps loosen and the finish slips off the tool in a sad little tangle. Light, constant tension the whole way through — that, and releasing the arm before you cinch, are the two things that separate a clean lock from a redo.
My take
A rotating finisher is the fastest path to a head you can trust. Buy one, give it ten minutes, never think about it again. If you want the actual recommendation and not a shrug: buy the Loon. The four-dollar clone genuinely works and I won’t pretend otherwise, but the sharpened base means the tool that finishes the fly also cuts the thread, and eliminating one set-down-and-lose-it cycle per fly is worth ten dollars roughly forty flies in. Spend the difference. It’s still the cheapest thing on the bench that fixes a problem costing you flies all season.
Method 2: the hand whip finish (two-finger method)
The hand whip uses your index and middle fingers to form the loop the thread wraps around — no tool at all. That pair is what “two-finger” means, and it matters: the thumb has a job later, but it isn’t one of the two. It’s slower than the tool, but it shines exactly where the tool gets clumsy: a #22 midge where the whip finisher feels like finishing a watch with a crowbar, or a campsite tying kit where you forgot the tool at home (you will, eventually).
Step by step
- Hold the bobbin in your off hand, with about six inches of working thread hanging from the hook.
- Form a V with your index and middle fingers extended, the thread laid across both — running from the hook, over your index finger, behind your middle finger, and back.
- Rotate your wrist to carry that loop around the hook shank. Each rotation lays down one wrap. Five rotations, five wraps.
- Pinch the loop with your thumb and middle finger and draw it down as you finish the last turn, collapsing the tag against the shank. This is where the thumb finally earns its keep.
- Locked. Trim and cement.
This is the method I use on the smallest stuff and when I’m tying somewhere that isn’t my bench — a tailgate, a cabin table, the floor of a tent during a rained-out afternoon. It’s slower and it looks fussier, but the head comes out the same.
What to practice: the wrist roll. It feels deeply unnatural for about fifteen minutes and then suddenly doesn’t. Do it over a desk, not your lap, so the flies you drop are findable.
My take
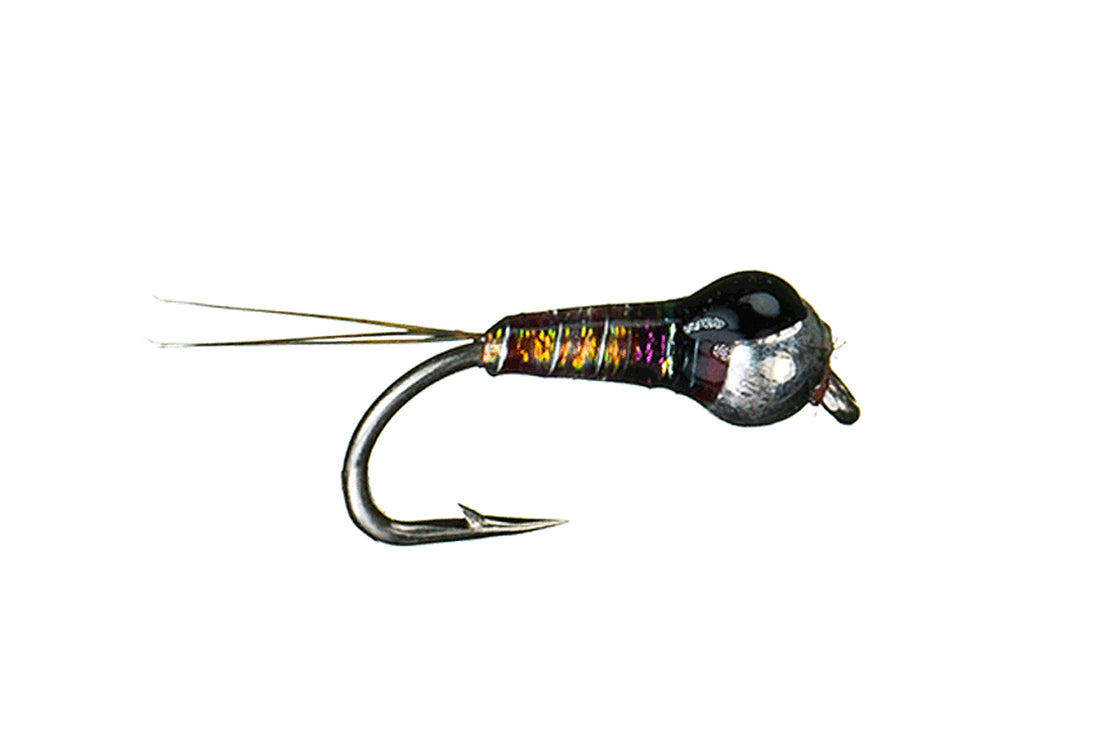
Learn it second, and ignore anyone who tells you otherwise. The hand whip gets romanticized as the real way to finish a fly — the purist’s move, no tool required — and beginners burn whole evenings on it before they can reliably finish anything, which is backwards. It’s a backup and a small-fly trick, and it’s the one that fits behind a bead on a Blowtorch when nothing else will. That’s plenty of reason to know it. It is not a reason to start there.

Why the head matters more than you think
It’s tempting to treat the head as the boring administrative end of the fly. It’s not — it quietly affects three things.
Profile. A clean, tight whip makes a small, smooth head. A bulky or lumpy one changes the fly’s silhouette in the water, and on glassy technical flats that’s the kind of detail that gets you refused. Cheesman Canyon browns and Deckers rainbows have seen more flies than I’ve tied — they register the difference between a clean head and a sloppy one even when I don’t.
Durability. This is the one everybody quotes numbers at you for, and I’m not going to, because nobody has actually tested it — including me. What I can tell you is the mechanism, which is the part that holds regardless: a whip finish holds by trapping the tag under wraps that tighten as the thread is pulled, so it fails slowly if at all. A stack of half-hitches holds by nothing but the friction of each loop against the last, so it starts creeping the first time teeth and grit work at it. That’s why the fly that comes apart on you is almost always a half-hitched one.
Clearance. A fat head crowds the hook eye, and you find out about it streamside, in wind, with cold hands, trying to thread 6X through a gap that thread cement has quietly narrowed. Ten sloppy wraps plus a generous glob of cement leave you picking at a fly with your teeth while the rise you were watching goes quiet.
There’s an actual number for this, and it’s the thing I wish I’d been given instead of “keep it small”: leave roughly an eye’s-width to an eye-and-a-half of bare shank behind the eye before you start the whip. Not a feel, a measurement — hold the fly up and look at the gap against the eye itself. A crowded head is the most common tell of a rushed fly and the most common reason a head unravels, and it’s a spacing problem long before it’s a technique problem.
Two habits keep the gap clear. Two thin coats of cement beat one thick one — the thick coat is what wicks forward and fills the eye while you’re admiring your work. And if cement does get in there, run a bodkin or a bare hackle stem through the eye before it sets. Ten seconds at the vise, versus a fly you can’t thread in the one hour the fish were on.
The bare-hook drill (how to actually learn this)
Here’s the practice trick nobody tells beginners: don’t learn the whip finish on a finished fly. Learn it on a bare hook with a few wraps of thread and nothing else to ruin.
Clamp a cheap #12 in the vise, lay down a thread base, and just whip-finish it. Cut it off. Do it again. Twenty reps in fifteen minutes, no materials wasted, no good fly sacrificed to a botched lock. You’re building the motion, not a fly. By the time you put a real pattern in the vise, your hands already know the move and you’re not fumbling a Blowtorch you spent four minutes on. I wish someone had told me this instead of letting me unravel a season’s worth of nymphs in the river first.
What beginners get wrong (and the fix)
- Half-hitching instead of whip-finishing. The fix is just learning the whip. Once it’s in your hands, half-hitches stop being tempting because they’re objectively more work for a worse result.
- Over-wrapping for “extra security.” Eight or ten wraps don’t make it safer, they make it lumpy — it’s the tying equivalent of double-knotting your shoes and then adding a third one for luck. Five is plenty. Trust the friction.
- Skipping the cement. The whip is most of the security; the cement is the insurance that gets you a full season instead of half of one. It’s a two-second step. Do it.
How long does it actually take to learn?
About ten minutes to a head that holds, and a couple of hundred flies to a head you stop thinking about. Those are different milestones and it’s worth knowing which one you’re at. The first is mechanical — the sequence works, the thread locks, you can finish a fly. The second is when the motion has moved out of your head and into your hands, and you notice it because you’ll finish a fly mid-conversation and not remember doing it.
The hand whip runs on a longer clock: an hour or two before it stops feeling like a party trick you’re failing at, and it never gets as fast as the tool. That’s fine. It isn’t supposed to.
What doesn’t shorten either curve is practising on finished flies, which is the mistake almost everyone makes — see the bare-hook drill above, and start from the beginning if you’re still assembling a bench.
The tools to practice with
If you’re starting out, a Matarelli-style rotating whip finisher is the right tool — the basic ones are a few dollars and they all work. Pair it with a decent thread and a small bottle of head cement or thin UV resin, and give it one focused session of bare-hook reps.
On thread, one distinction worth having before you spend money — and it’s a three-way, not the two-way most shelves imply:
- Nylon (Danville 6/0 Flymaster is the spool half the tyers reading this already own) stretches. That give is forgiving — it absorbs a too-hard pull instead of snapping — at the cost of some precision, and it builds slightly springy heads.
- Polyester (Veevus, UNI, UTC) has less stretch and lays flatter, which is crisper control and cleaner low-bulk heads. This is what I’d learn on.
- Gel-spun — GSP, the same fiber family as braided fishing line. Semperfli’s Nano Silk is the one on my bench. Vastly stronger for its diameter with almost no stretch, which is why it owns deer-hair work and small flies. It’s also slick enough to want those extra wraps, and careless enough handling will let it saw into itself.
Which makes the expensive thread the wrong thread to learn on: it will happily hold a fly together while sliding straight out of the one knot you’re trying to practice. Start on nylon or polyester. Graduate once the whip is automatic.
You can stock thread, whip finishers, and head cement through The Fly Fishing Place — use code RDC at checkout. Their tying section covers the standard bench inventory without making you guess.
Frequently asked questions
Do I really need head cement if my whip finish is good? You can technically fish a cement-free whip, but you shouldn’t. The wraps hold, but teeth, grit, and a season of getting soaked work them loose over time. A drop of cement is the cheapest durability upgrade in tying, and skipping it to save two seconds is how you end up spending four minutes retying a fly at the vise in February. Ask me how I know.
Why does my whip finish keep slipping off the tool? Almost always slack thread. If the bobbin loses tension at any point during the rotation, the wraps loosen and slide off. Keep light, steady tension the entire way through and the problem disappears.
Can I fix a fly that’s unravelling on the water? I don’t, and I’d tell you not to bother. Cut it off and tie on another one. A whip finish that’s failing has usually been failing slowly and gave you warning at the vise; a half-hitched head that’s started creeping is already past the point where you can re-lock it, because re-locking needs thread tension you don’t have standing in a river. The real answer is upstream: two short whip finishes on the patterns you fish hardest, and carrying enough of a fly that losing one doesn’t end the day.
Is the whip finish the same on a jig hook? Yes — the motion is identical. The only difference is that on a jig nymph you’re often working right behind a tungsten bead, so you’ve got less room. That’s a good argument for keeping your thread head small and your wrap count to five.
Bottom line
The whip finish is the least glamorous five seconds of tying a fly, and it’s the part that decides whether the fly lasts a season or a sunrise. Learn it on the tool, learn the hand version as a backup, and stop half-hitching. Five wraps, one drop of cement, and a small clean head — that’s a fly that comes home.
Next: put it to work — here are the eight South Platte patterns worth learning to tie, and what’s actually worth shelf space once you’re tying enough to care.