The problem with most chest pack reviews is that they’re written by people who carried the pack to the car and back. I’m not going to pretend I’m above buying gear I don’t need — my closet is a museum of “this’ll be the one” — but the Overlook actually earned its spot. I fished the Umpqua SWIFTLINK Overlook as my everyday pack for a long stretch. I’ve worn it on the 1.3-mile approach into Cheesman Canyon, on full-day sessions at Deckers, on spring runoff mornings at the Dream Stream. I’ve run the LINK accessory system on it for every one of those days.
Update, July 2026: my everyday carry has since moved to the Fishpond Stormshadow — a simpler, slimmer, waxed-cotton pack. Everything below still stands: the Overlook held the everyday spot for a long time, and the LINK accessory system remains the best magnetic tool setup I’ve fished.
So here’s everything — all four SWIFTLINK packs with real specs, all eight LINK accessories with dimensions and prices, what I actually carry and where, what the system gets right, what it doesn’t, and exactly who should buy which option. Grab a coffee. This one’s thorough.
The short answer
Umpqua’s SWIFTLINK line is four packs built around LINK, a magnetic accessory system whose Base Station clips into die-cut ports so tools snap off and back on without looking: ThunderCreek chest ($149.99), Steamboat sling ($199.99), Overlook chest ($229.99), and Ledges waist ($229.99). I fish the Overlook (9.8L, 12 LINK ports, detachable 300ci backpack) for hike-in tailwater days — buy the ThunderCreek for short roadside sessions, the Steamboat for spey, the Ledges for guiding or float; and if you’re just testing LINK, the $24.99 DryDock floatant holder is the piece to buy first.
That’s the whole lineup in a paragraph — everything below is the full specs, prices, and who each one is actually for.
The Problem Umpqua Was Solving
Before getting into the gear: chest packs are miserable in one specific way. Everything that isn’t in a zippered pocket is either clipped to a lanyard or stuffed in a pocket. Nippers on a lanyard swing when you wade. Forceps on a retractor knock against the pack face every time you bend down. Floatant goes somewhere — wherever it fits — and you dig for it mid-hatch while the rise window quietly closes on you.
Every tool is attached independently, through a different mechanism, to a different part of the pack. There’s no system. You build habits around finding things rather than accessing them.
The LINK platform solves this. All your tools live on a magnetic baseplate in a consistent position. They snap off clean and snap back without looking. There’s no lanyard to tangle, no retractor to jam. It sounds like a small thing — I rolled my eyes at “magnetic accessory ecosystem” too. After a few days on the water with it, you realize how much mental overhead the old setup cost.
The LINK Accessory System — Full Breakdown
LINK is Umpqua’s magnetic accessory ecosystem, built around a magnetic baseplate called the Base Station. Every LINK accessory attaches to a Base Station with a directional magnetic snap. The Base Station clips into the die-cut ports on any SWIFTLINK pack, or onto standard webbing on any pack you already own.
The die-cut ports are square cutouts in the pack face — not slots, not zippers, not attachment points. They’re precisely sized for the Base Station clip, which locks in without rattling. On the Overlook I run four Base Stations: two built into the pack ports and two I added separately on the shoulder straps.
What is the Umpqua LINK system?
LINK is Umpqua’s magnetic accessory ecosystem. Every tool — nippers, floatant, fly docks, tippet — lives on a magnetic baseplate called the Base Station, which clips into the die-cut ports on any SWIFTLINK pack or onto webbing on a pack you already own. Accessories snap off clean and snap back without looking, so there’s no lanyard to tangle and no retractor to jam.
LINK Base Station — $19.99 for 2-pack + bridge connector
Single station: 1.25” × 1.25” × 0.75” | Double station: 3.5” × 1.25” × 0.75”
The entry point to the system. The bridge connector links two single stations into a double, which is what you need for accessories like the Tippet Tower that span a wider footprint. Every SWIFTLINK pack includes one Base Station (and one HatchPad Single — see below). The 2-pack lets you add attachment points on existing gear before committing to a new pack.
GearDock Single — $19.99 | Dimensions: 1.75” × 1.5” × 1”
Magnetic tool holder for nippers, forceps, hemostats. The directional snap means you attach tools with a specific orientation — they don’t rattle loose but they release cleanly when you pull. I run my Simms nippers and my forceps on a GearDock Double on the left port of the Overlook. Neither has moved unintentionally once.
GearDock Double — $34.99 | Dimensions: approx. 3.5” × 1.5” × 1”
Same mechanism, holds two tools. The width spans a standard Umpqua LINK port comfortably.
HatchPad Single — $24.99 | Dimensions: 1.75” × 1.5” × 1”
Magnetic fly dock for drying and staging flies. The magnets run edge to edge, which means a #22 midge and a #12 Meat Whistle both hold flat without moving. I use mine for the three or four patterns I’m rotating through during a hatch — no opening boxes on the water. Every SWIFTLINK pack includes one.
HatchPad Double — $44.99 | Dimensions: approx. 3.5” × 1.5” × 1”
Two fly docks in one footprint. Useful if you’re staging two different pattern sizes simultaneously — a PMD and a midge dropper, for instance.
DryDock Floatant Holder — $24.99 | Dimensions: 1.75” × 1.5” × 1.5”
Form-fitting cradle that holds Dry Magic, Shimi Shake, and similar standard-size gel and powder bottles. Magnetic snap-off means you can open the bottle and apply floatant without ever removing the holder from the pack. I run mine on the right chest port of the Overlook. It’s been the most functionally impactful change to my setup — floatant is now exactly where I reach for it, every time.
Tippet Tower — $39.99 | Dimensions: 1.75” × 1.5” × 4”
Vertical magnetic stacker for up to 6 tippet spools. Fits spools from any major brand — Rio, Seaguar, Scientific Anglers, doesn’t matter. The tower magnetically detaches as a single unit when you need to pull multiple spools at once. I don’t run this on the Overlook — I prefer to keep tippet in a vest pocket — but for anglers who work from a single pack setup, this eliminates the scatter. The 4” height means it needs a clear port location on the pack face.
HatchVault — $49.99 | Dimensions: 4” × 2.5” × 1.25”
Fly deck with FlyTrap slit foam on the interior and a magnetic pad on the exterior top face. The interior holds a full selection of flies secured in foam; the exterior magnetic face doubles as a HatchPad for staging. Comes with two Base Stations and a bridge connector. This is the most versatile single LINK piece — it’s a portable fly box that also mounts on the pack and also holds flies externally. At $49.99 it’s the highest-ticket accessory, and it earns it.
Complete LINK Pricing Reference
| Accessory | Dimensions | Price | Included w/ pack |
|---|---|---|---|
| Base Station 2-pack | 1.25” sq × 0.75” each | $19.99 | 1 station per pack |
| GearDock Single | 1.75” × 1.5” × 1” | $19.99 | — |
| GearDock Double | ~3.5” × 1.5” × 1” | $34.99 | — |
| HatchPad Single | 1.75” × 1.5” × 1” | $24.99 | 1 per pack |
| HatchPad Double | ~3.5” × 1.5” × 1” | $44.99 | — |
| DryDock | 1.75” × 1.5” × 1.5” | $24.99 | — |
| Tippet Tower | 1.75” × 1.5” × 4” | $39.99 | — |
| HatchVault | 4” × 2.5” × 1.25” | $49.99 | — |
The Four SWIFTLINK Packs
All four packs share the same LINK-port architecture and the same included accessories (one Base Station + one HatchPad Single). The differences are carry format, capacity, and LINK port count.
ThunderCreek Chest Pack — $149.99
Specs: 5.7L / 350ci | 6 fly boxes | 10 LINK ports
Organization: Single main compartment | Flat back panel with zippered pocket | 1 stretch mesh external pocket | Net storage loop | D-ring
The ThunderCreek is Umpqua’s minimalist option — and it’s genuinely minimalist, not “minimalist but actually medium,” which is the trick most brands pull. 5.7 liters is a constraint. Six fly boxes, a tippet wallet, some leader material, and you’re at capacity before you’ve thought about a rain layer or a granola bar.
For anglers who know their day before they show up: three boxes, two accessories, half-day session at a familiar section. The ThunderCreek is honest and light. It doesn’t try to be the Overlook at a lower price point. At $80 less, you’re giving up the detachable backpack, two LINK ports, and 4.1L of capacity. If those things matter to your fishing, they matter.
What I use it for: day trips where the car is close and I’m rotating through one hatch. Otherwise the Overlook.
Cons: The single main compartment means no organization — everything goes in together. 10 LINK ports is enough for the basics but limits a full accessory setup.
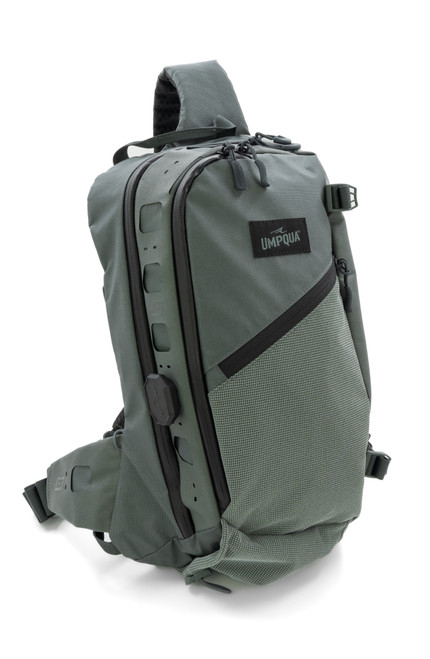
Steamboat Sling Pack — $199.99
Specs: 11.5L / 700ci | 12 fly boxes | 10 LINK ports
Organization: Main compartment (6 large boxes) | Secondary pocket (smaller boxes) | Full-length internal zipped pocket | 4 internal mesh pockets | 1 external zip stretch mesh pocket | Net slot (full pass-through back panel)
The Steamboat solves a specific problem: a chest pack in front of you interferes with a spey or switch cast. The D-loop catches the pack if it’s center-chest. A sling pack rides on the shoulder and back, clears the casting lane, and still gives you access to your gear by rotating the pack to your front.
For two-handed anglers on the South Platte — Dream Stream or Eleven Mile in spring — the Steamboat is the only SWIFTLINK format that actually fits the style. 12 fly boxes and 700ci is enough for a full guide kit. The 10 LINK ports (vs. 12 on the Overlook and Ledges) is the only spec concession.
For single-hand tailwater wade fishing, a sling is a less natural format than chest or waist. You can make it work but you’re building a habit around it. The Overlook or ThunderCreek stays put without thinking about it.
Cons: Sling format isn’t for everyone. 10 LINK ports means you prioritize accessories. At $199.99 you’re paying more than the ThunderCreek for a format that requires commitment.
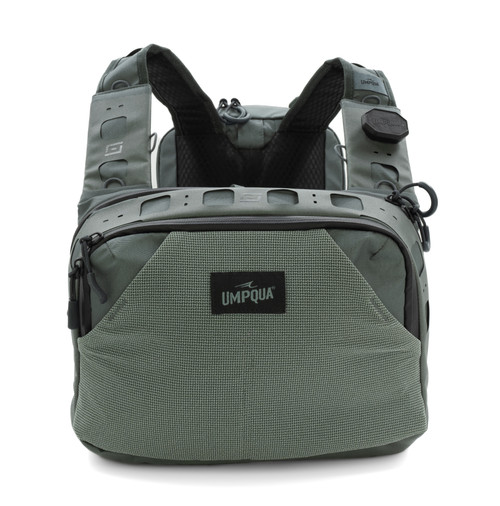
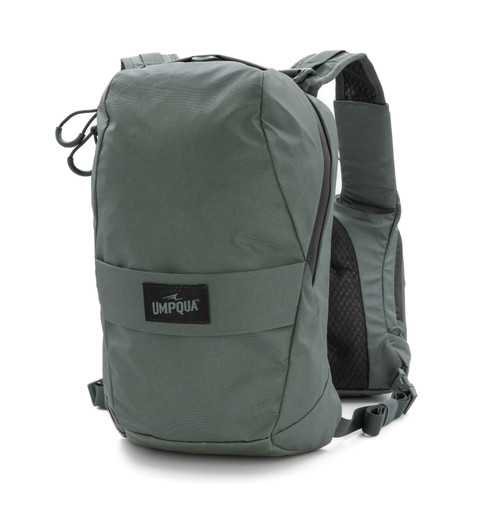
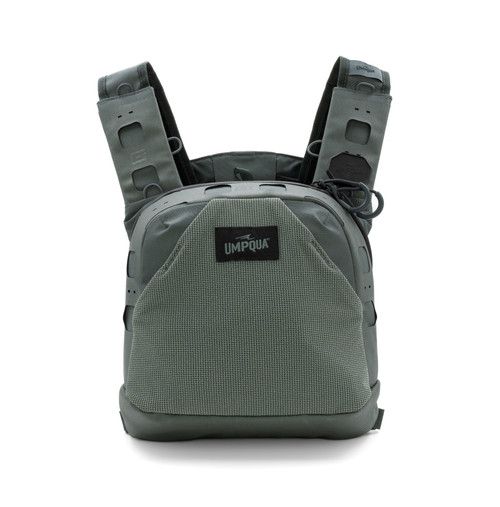
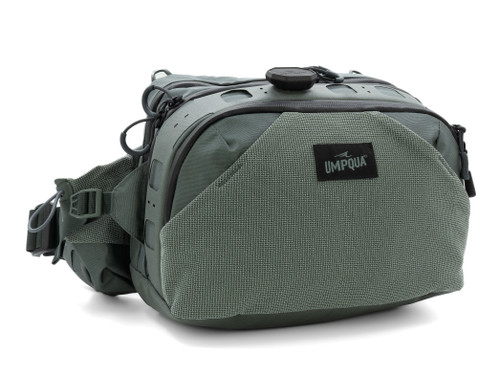
Overlook Chest Pack — $229.99 ★ What I fished for years
Specs: 9.8L / 600ci total | 10 fly boxes (chest) + detachable 300ci backpack | 12 LINK ports
Organization: Main compartment | Secondary pocket | 4 internal mesh pockets | Dual stretch mesh external pockets | Full pass-through net slot (backpack) | 12 LINK ports on chest face
The Overlook is a chest pack with a backpack section that detaches. That sentence undersells what it actually does.
The detachable back section is 300ci — enough for a rain layer, a lunch, a first aid kit, and your car keys. On the approach to Cheesman Canyon, which is 1.3 miles over uneven granite with 600 feet of descent, I want everything I’m carrying on my body. The full setup rides well: chest pack locked forward, back section on the back, like any daypack. When I reach the canyon and set up to wade, the back section stays on the back or goes in a poolside spot. The chest pack is what I fish from — organized, accessible, everything in its place.
This solves the fundamental chest pack tradeoff. Traditional chest packs force you to either carry enough for the day (which means a heavy chest-forward load) or leave things in the car (which means going back mid-day or going without). The Overlook removes that decision.
The 12 LINK ports give full placement flexibility. My current setup on the Overlook:
- Port 1 (left chest): GearDock Double — Simms nippers + Umpqua forceps
- Port 2 (right chest): DryDock — Dry Magic floatant
- Port 3 (left shoulder): HatchPad Single — staging flies during a hatch
- Port 4 (right shoulder): HatchPad Single — flies drying from the previous drift
All four within reach without looking. No lanyards. No searching pockets. Nothing moves when I wade.
What I tested before landing here: Fishpond Thunderhead chest, Simms Freestone chest, Vedavoo T-Rig vest, Patagonia Stealth hip pack, two unnamed options from local shops. The Overlook is better than all of them for the way I fish — full-day hike-in sessions where I need both carrying capacity on the approach and fast access on the water.
Cons: $229.99 is real money. The Overlook doesn’t make every day better — it makes hike-in days and long sessions better. If you’re fishing a half-mile from the parking lot, the ThunderCreek covers you for $80 less. The back section adds bulk on the water if you leave it attached — most anglers will stash it bank-side. And the pack runs in one color (sage) — if that doesn’t work for you, it doesn’t work for you.
Ledges Waist Pack — $229.99
Specs: 11.5L / 700ci | 12 fly boxes | 12 LINK ports
Organization: 3 full-length zippered pockets | Dual stretch mesh pockets | 2 built-in water bottle holders | Shoulder strap included | Net slot pass-through | 12 LINK ports
The Ledges carries everything at the same price as the Overlook. If capacity is the primary goal and you’re not hiking in — float fishing, guided client days, all-day bank sessions — the Ledges makes sense. Three full-length zippered pockets is more organization than any other pack in the SWIFTLINK line.
The tradeoff is where that weight sits. A waist pack in deep wading puts 11.5L on your hips. In chest-deep water on the Cheesman sections, a waist pack is underwater. The Ledges is built for wade conditions where you’re not going past your waist — tailwater sections with accessible banks, drift boat gunwale days, guide operations where you’re managing two people’s gear.
Cons: Hip-mounted weight is the wrong format for deep tailwater wading. If you’re in chest-deep water regularly, this pack fights you. The shoulder strap helps distribute load on the bank but doesn’t solve the wading problem.
Pack Comparison — Full Reference
| Pack | Volume | Fly Boxes | LINK Ports | Detachable Back | Net Slot | Price |
|---|---|---|---|---|---|---|
| ThunderCreek Chest | 5.7L / 350ci | 6 | 10 | — | Loop | $149.99 |
| Steamboat Sling | 11.5L / 700ci | 12 | 10 | — | Full pass-through | $199.99 |
| Overlook Chest | 9.8L / 600ci | 10 | 12 | ✓ (300ci) | Full pass-through | $229.99 |
| Ledges Waist | 11.5L / 700ci | 12 | 12 | — | Full pass-through | $229.99 |
My take
Four packs in, here’s the pattern: each one is honest about a specific kind of fishing day, and the expensive mistake is buying for the day you imagine rather than the day you actually have. I hike in and fish long, so the Overlook earns its price — but if most of your sessions are a few hours off a pullout, the ThunderCreek is the smarter buy and the $80 you keep is real fly money. The pick I’d avoid is the compromise, chosen to cover every scenario — my closet is full of those, and none of them get fished. Match the pack to your usual Tuesday, not your fantasy season.
Which Pack to Buy — Decision Framework
Buy the ThunderCreek if: You fish half-days with a focused box selection, your section is roadside or a short walk, and $149.99 feels more honest for your use frequency. It covers the basics without pretending to be more.
Buy the Steamboat if: You fish spey or switch and a chest pack catches your D-loop. This is the only format that solves that problem in the SWIFTLINK lineup.
Buy the Overlook if: You hike in to fish (Cheesman Canyon, Dream Stream, any access that requires real walking), you fish full days where your needs change between the approach and the water, and you want the highest LINK port density in the chest format.
Buy the Ledges if: You’re floating, guiding, or fishing from the bank on sections where you never go past hip-deep — and you want maximum capacity without a backpack.
Building a Complete LINK Kit — What It Actually Costs
The packs include one Base Station and one HatchPad Single. Here’s what a fully-equipped Overlook setup costs at my current configuration:
| Item | Price |
|---|---|
| Overlook Chest Pack | $229.99 |
| Additional Base Station 2-pack | $19.99 |
| GearDock Double (nippers + forceps) | $34.99 |
| DryDock (floatant) | $24.99 |
| Additional HatchPad Single (staging) | $24.99 |
| Total | $334.95 |
That’s the kit I fish. You can get there for less by using the included Base Station and HatchPad and adding pieces over time — the system is designed for that. The $19.99 Base Station 2-pack is also the lowest-risk way to test LINK on a pack you already own before committing to a new SWIFTLINK pack.
The Verdict
The Overlook was the best chest pack I’d used for years — and I’ve owned enough packs to fill a tag sale, so that’s a higher bar than it sounds. Not because of any single feature — because the combination of the detachable back section, the 12-port LINK interface, and the overall organization is the first setup that hasn’t irritated me at some point in the day.
The LINK system is a genuine improvement over standard tool attachment. The magnet strength is appropriate — accessories don’t fall off, but they release cleanly when you want them. The DryDock is the piece I’d buy first if you’re testing the system. Everything else follows from there.
If you’re shopping the full lineup: Overlook for hike-in tailwater fishing, Ledges for guides and float anglers, Steamboat for spey, ThunderCreek for focused short sessions — all four ship from Tactical Fly Fisher. For the full gear setup that goes with the Overlook on a Cheesman day, the South Platte day trip gear checklist covers everything else in the pack.
Buy once, cry once. I preach owning less gear, not more — but if I’m going to break my own rule, this is the pack I’d break it for.
Rocky Drift Co. may earn a commission through affiliate links. Read our disclosure.